
Three Days in New York City: What I Wish I Knew Before Visiting | A Visitor’s View (Part 3)
Disclosure: This post may contain affiliate links. We may earn a commission for purchases made through links in this post, at no cost to you.
After three days of exploring New York, I came home with my camera roll overflowing and a mental list of things I wish I’d known before going. Some were small details, others big hacks which all made my trip easier, safer and more enjoyable. In this article, I’ll be covering everything I wish I knew before visiting NYC for the first time.
If you haven’t read Part 2, where I cover my planned itinerary vs. reality, check it out!
What I Wish I Knew Before Visiting NYC
Pick the Right Hotel Location
One of the best decisions we made was booking a hotel in Manhattan. It made getting around so much easier as most major attractions were either walkable or just a short subway ride away.
In the beginning, I considered staying in New Jersey because the hotels were much cheaper. But my friend, who had been to New York before, immediately vetoed that idea: “You’ll waste half your trip just commuting.” She was right. Between ferries, train rides, and waiting times, the savings wouldn’t have been worth the lost time.
For short trips, time is money. Staying in Manhattan gave us flexibility where we could head back to the hotel anytime to rest, drop off shopping bags, or freshen up before going out again which saved us a lot of time.
That said, the area we stayed in (Hell’s Kitchen) felt a little off at night. So, if you’re two women traveling together, I’d recommend choosing a spot that feels safe after dark, even if it’s slightly pricier. We stayed at the Holiday Inn Express on West 39th Street. The staff were genuinely kind and even let us check in early. The downside was that the elevators were out of service so we had to lug our suitcases down the stairs and we had to pay a surprise “destination fee” of 17 dollars per day.
Mini NYC Travel Tips:
- Check for destination fees before booking because many hotels charge $20 or more per night for “amenities,” which can be a surprise if you’re not expecting it. Search “No Destination Fee” hotels HERE.
- Most hotels will hold your luggage if you arrive early, so you can start exploring right away.
- Convenience in NYC is everything. Pick a location that saves you time, not just money.
Transportation Tips
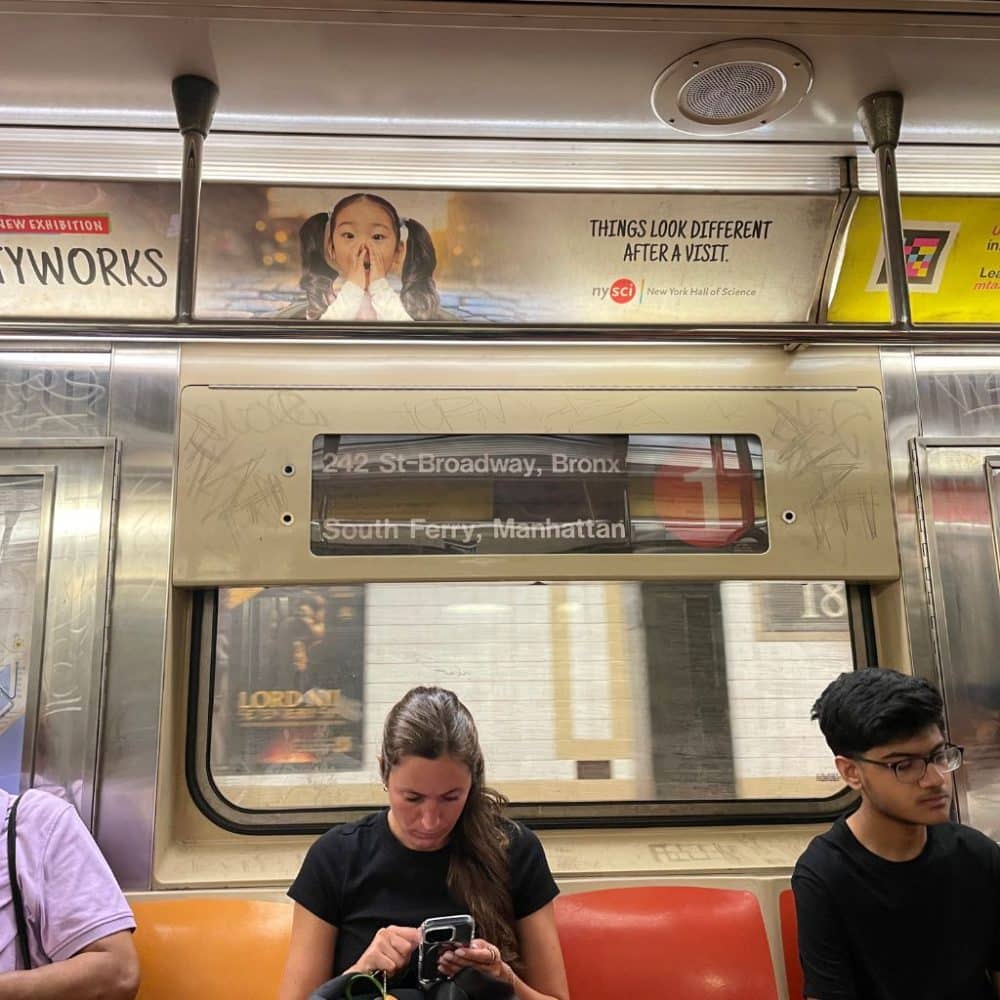
Don’t Be Afraid of the Subway
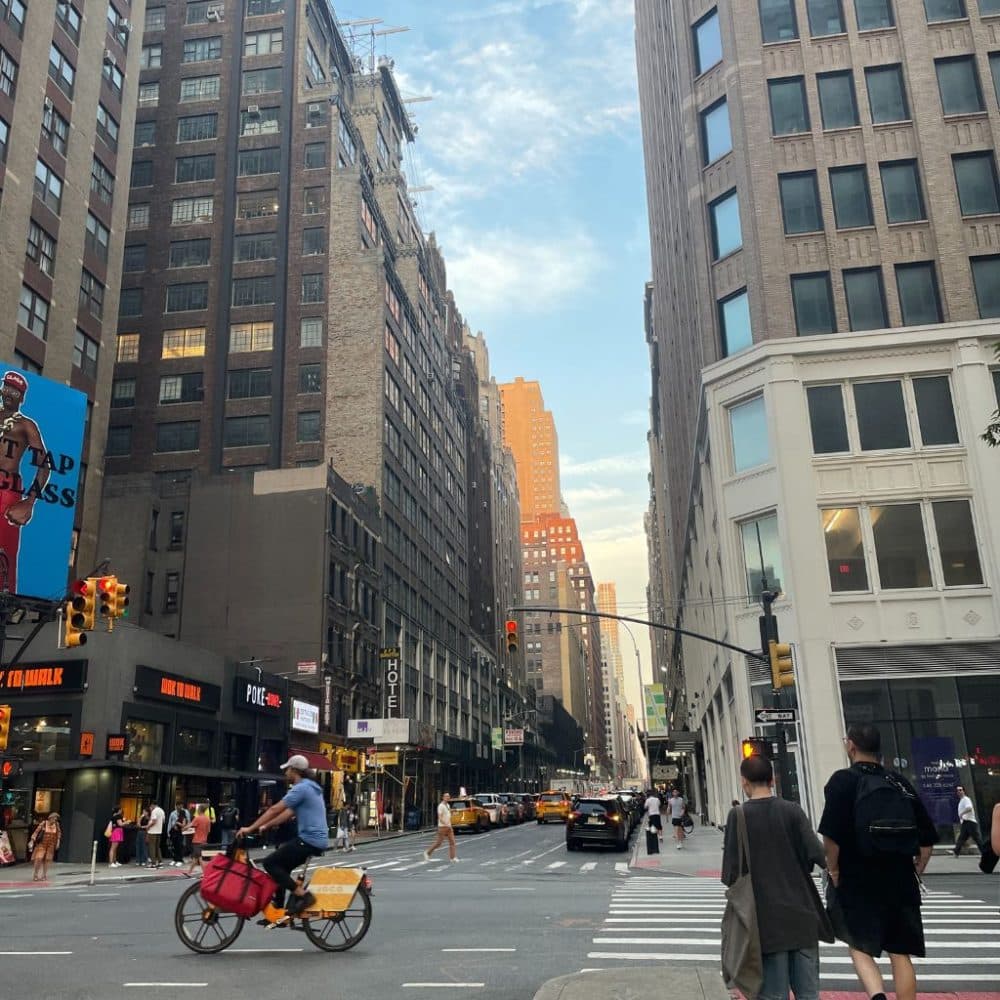
It’s not as intimidating as it looks! Manhattan is a walking city, but the subway will save you time and money. Once you get the hang of it, it’s surprisingly easy and way more budget-friendly than taking Ubers everywhere.
Use Google Maps (it’s a lifesaver), it’ll tell you exactly which train to take and even which platform. Just remember to learn some subway etiquette before you go (like letting people off before you step in and not blocking exits).
Weekend delays
Always expect interruptions on weekends. Plan for double the travel time; Google Maps won’t always show scheduled maintenance.
Plan Your Route from the Airport Before You Land
Getting into Manhattan is pretty straightforward, but knowing exactly how you’ll reach your hotel can save you a ton of stress and money. The AirTrain + LIRR combo from JFK to Grand Central is fast, affordable (around $15), and reliable. If you’re arriving late or have heavy luggage, an Uber might be the easier option. Don’t wing this part but plan it ahead so your first time in NYC starts smoothly.
Maximize Your Days
Arrive in New York as early as possible so you can make the most of your first day. Similarly, if your departure is later at night, you essentially get an extra day to explore. Planning your flights this way can add a lot of sightseeing without feeling rushed.
Don’t Be Afraid to Ask New Yorkers for Directions!
If you’re lost, just ask someone! New Yorkers may look rushed, but they’re actually very helpful and will usually give you quick, clear directions. Most people are happy to help as long as you keep it short and polite.
Planning the Itinerary
Planning your days is important, but overplanning can ruin the fun. Here’s how to strike a balance:
Visualize the City First
Understanding Manhattan’s layout makes planning so much easier. The city is divided into Uptown, Midtown, and Downtown, and getting a sense of these areas beforehand helps you see how attractions are spread out. I recommend creating a “New York” list and noting all the locations you want to visit. This gives you a clear picture of distances, walking times, and how to realistically structure your days. Grouping nearby spots together like “this is a 10-minute walk from that” makes your itinerary flow more naturally and prevents backtracking.
Plan Your Itinerary with Google Maps
Google Maps is an incredibly useful tool for mapping out your trip. I saved every destination I wanted to visit in a “New York” list, which allowed me to visualize routes, estimate walking times, and plan each day efficiently. Pairing this with the Uptown, Midtown, and Downtown grouping gave me a clear overview of the city and helped me maximize my time without feeling rushed or having to retrace steps.
It’s Vital to Have a Must-See List
Make a “must-see” list and an “okay-to-skip” list. That way, if you run out of time, you won’t stress over missing anything. Aim for no more than two main activities a day, and if you have extra time, then you can move on to your lower-priority spots.
Plan Smart: Two-a-Day Rule
Try planning around two main activities a day and keep them in the same area. It saves time and energy. For example, you could do Central Park + The Met (Uptown), Summit One Vanderbilt + Midtown sights, or a Statue of Liberty cruise + Downtown spots. Grouping things by neighborhood keeps your day chill and less rushed.
Check Timings Before You Go
Always research the opening and closing times of the places you plan to visit. Some museums and attractions close surprisingly early, around 4 pm, while others, like The Met, have varying hours depending on the day.
Check admission prices, ticket requirements, and whether online booking is needed. A quick Google search before heading out can save you from disappointment or wasted time. Planning this in advance ensures you make the most of your visit.
Have an Indoor Backup Ready
You never know when the weather might turn. Always have a few indoor spots planned, like museums, libraries, or cafés, just in case the rain or heat gets too intense.
Leave Space for Spontaneity
The best parts of New York are often the unplanned ones, like stumbling upon a hidden café, a street artist, or a small local market. Be flexible and open to veering off the schedule. The city is more fun when you don’t treat it like a checklist.
Plan Breaks
Walking in New York is no joke. Even when things look close on the map, they often aren’t! Schedule café stops or park breaks throughout the day to recharge and rest your feet.
Food vs. Sightseeing
Decide whether you want to plan your day around restaurants or landmarks. I personally planned around attractions and grabbed food along the way (street food, food trucks, or quick takeout), which worked perfectly.
The Importance of Research
Doing a little research before each activity made a huge difference. Going online beforehand and looking up everything helped me avoid surprises and plan more efficiently. Watching YouTube videos on certain attractions gave me a clearer sense of what to expect, and reading tips from other travelers saved me from little blunders.
For example:
- One Vanderbilt: People online warned me that my shoes would be covered and that some floors are glass, so I knew how to prepare and wasn’t caught off guard. I also watched videos to figure out the best photo angles.
- Liberty Island Cruise: Research helped me figure out which website to use, how to prepare for the August heat and how long I would need to spend there (which was at least 4 hours).
- The Met: I was able to plan out which exhibits I wanted to see, which saved time and helped me get through the gallery even though I was short on time.
Lesson: Spending time researching logistics, highlights, and small details online can make experiences smoother, reduce stress, and ensure you’re fully prepared for each attraction.
Money & Payment Tips: Almost everything in Manhattan is tap-to-pay, which makes spending super easy and convenient. That said, it’s still smart to carry multiple credit cards in case one doesn’t work or fails to tap. Most shops, restaurants, and even food trucks accept tap, but smaller places, especially in Chinatown, may require cash. For extra safety, carry around $50 in cash as a backup so you’re prepared for anything.
Don’t Miss the Skyline: Observatories Are Worth It
I went to Summit One Vanderbilt, which was a bit pricey, but honestly, the views were straight out of a movie. You don’t need to visit every observatory deck. Just pick one that fits your vibe. Other good options are Top of the Rock or Edge, each offering a slightly different view of the city.
Tips (One Vanderbilt):
- Book in advance: sunset slots sell out fast.
- Arrive early (about 30 minutes) to get through security smoothly.
- Avoid dresses or fancy shoes: the glass floors and mirrored surfaces are super reflective.
- Watch for glare: bring a lens cloth or take photos in shaded spots for clearer shots.
Statue of Liberty Shortcut
If you’re planning to visit Liberty Island to see the Statue of Liberty, be careful because there are plenty of scammers around the downtown area (especially near Battery Park) who’ll offer to “help” you buy tickets. Only purchase tickets from Statue City Cruises, the official operator.
If you just want to see the statue without visiting the island, hop on the Staten Island Ferry. It’s completely free and offers a great view from the water.
Metropolitan Museum of Art (The Met) & Central Park
The Met is massive, and you could easily spend an entire day there. If you’re short on time, plan your route and what exhibits you want to see in advance. I focused on the Roman art, the American Wing, the Egyptian collection, and a few favorite painters like Van Gogh and Monet, and managed to see them all in about two hours.
I think planning what you want to see beforehand is a good idea for you to avoid wandering aimlessly. They hand out maps at the entrance, which is super helpful if you want to adjust your route on the spot.
The walk from Central Park to the Met is gorgeous, so make it part of your visit. I started at Columbus Circle, about a 30-minute walk to the museum, but we took our time, stopping to rest in the park and passing Bethesda Terrace, which was absolutely stunning.
Bonus tip: Grab brochures from museums or public libraries since they make for great free souvenirs.
Pro Tip: Watch John Barr on YouTube
Before my trip, I watched a bunch of John Barr’s videos about New York, and they were incredibly helpful. He covers everything from navigating the subway to spotting common scams and tips for getting around the city safely. If you want to avoid tourist traps and feel more confident exploring NYC, I can’t recommend this channel enough. It made my trip so much smoother and stress-free.

Packing Tips: What to Bring for NYC
Packing for New York can feel overwhelming, especially in the summer. Here’s what I learned the hard way:
Comfortable Shoes Are a Must
You’ll walk a lot in Manhattan, often without realizing it. Even short distances add up. A good pair of sneakers can make the difference between a fun adventure and sore feet by noon.
Backpack Essentials
Bring at least two power banks (your phone battery will drain quickly from maps and photos), hand sanitizer, a water bottle, a collapsible tote bag, cash, cards, wet wipes, and lip balm. A portable fan and sunscreen are absolute lifesavers in the August heat. The most important thing is the power bank, so make sure it’s charged before you start the day and that the wires are actually working.
Clothing & Layering
Layers are your best friend in NYC. The city can go from scorching hot outdoors to chilly indoors (like in museums or air-conditioned restaurants) in minutes. The key is to layer strategically: wear light, breathable pieces underneath so you can easily remove a layer if it gets too hot, and have a thin jacket or sweater on top that you can add if it gets chilly. Avoid heavy single layers that are hard to adjust, like a thick jacket with nothing underneath, because you won’t be able to regulate your comfort throughout the day. Planning outfits in advance is helpful, especially if you have photo spots in mind, but always prioritize comfort and adaptability. Bringing a lightweight backup piece for photos or unexpected temperature changes can save a lot of discomfort.
Extras
Items like eye drops, painkillers, or basic medication can be pricey in NYC, so pack them in advance. Always carry essentials for headaches, stomach issues, or minor discomforts just in case.
NYC in August Gets Brutal (Be Prepared)
New York summers are no joke. Temperatures often hit 30–32°C, and the heat reflects off the concrete, making it feel even hotter. Even short walks can leave you drenched, and indoor A/C won’t help once you’re back on the streets.
Wear light, breathable clothing and layer up so you can quickly adjust if it gets too hot or chilly. Bring a cap, sunglasses, and sunscreen to protect yourself from the sun. A portable mini fan isn’t essential, but it can be really helpful in the August heat. Don’t forget a refillable water bottle to stay hydrated, and plan breaks in shaded areas, cafés, or museums to recharge throughout the day.
Check the Weather Daily
NYC weather can change in a flash, and I learned the hard way. Always check the weather before you head out. One day, I didn’t check the forecast, and suddenly it started pouring. I hadn’t planned any indoor backup activities, so we ended up just wandering and trying to make the best of it. The lesson? Even if you’re spontaneous, a quick weather check every morning can save you time, stress, and soggy shoes. A little planning goes a long way in keeping your trip smooth while still leaving room for adventure.
Food & Budget Tips
New York is one of those cities where you can eat for $5 or $500. It just depends on what kind of traveler you are. I didn’t plan my days around food as much; I mostly ate wherever I happened to be. Sometimes that meant grabbing something from a food truck and sitting at a park bench, which was actually kind of fun.
If you’re a foodie, it’s worth planning a few must-try places in advance. I had a few viral TikTok food spots on my list (like Joe’s Pizza), but the lines were so long that by the time I got there, I was too exhausted to wait. So my advice: save a few options on Google Maps near your main sightseeing areas. That way when hunger hits, you can just check what’s nearby instead of trekking across the city just for one dish.
Eating Cheap (and Smart) in the City
If you’re on a budget, New York is still totally doable. You can easily eat well for cheap with food trucks, dollar-slice pizza, and delis are your best friends. Also, halal food carts are everywhere. Some of the best meals I had were from halal trucks, they were quick, delicious, and filling.
That said, use a little common sense when picking where to eat. The NYC Health Department grades every restaurant with an A, B, or C placard in the window. If you see “Grade Pending” or anything less than an “A,” just keep walking. You can also check a restaurant’s inspection history online at nyc.gov/restaurantgrades. It’s easy to use and worth a quick look if you’re unsure. And when it comes to delis, bodegas, or food carts – if the spot doesn’t look clean or busy, skip it. Hot dogs from random street carts can be a bit of a gamble. Growing up, locals even called them “the bellyache man.”
A Few Food Lessons I Learned the Hard Way
On a related note, finding a bathroom in NYC can be its own little adventure. Public restrooms are surprisingly hard to come by, even for locals. Some cafés and stores keep theirs for customers only, so plan ahead. There are apps like Got2Go NYC that help you locate nearby restrooms, and it’s worth having one downloaded before your trip. Trust me, combining a questionable meal with nowhere to go is not the memory you want to take home.
Another underrated tip: if you want to try a restaurant but don’t want to pay the full dine-in price (or wait forever), just order takeout and eat it in a park. It’s cheaper, faster, and way more relaxed.
Oh, and if a food stall doesn’t display its prices, always ask before ordering because a few tourists do get scammed that way.
If there’s something you really want to try but can’t fit into your trip, don’t worry. I couldn’t make it to Levain Bakery, so I just ordered their cookies on DoorDash. Problem solved.
New York food is amazing, but don’t pressure yourself to chase every viral place. Sometimes, the random diner you stumble into at 10 p.m. ends up being your favorite memory.
Quick bites:
- NYC pizza: You have to try it. Any local pizzeria will do. It’s famous for a reason.
- Halal food trucks: Some of the best, cheapest, and most satisfying meals.
- Budget eating: Food trucks, dollar-slice pizza, and delis are your best friends.
- Avoid scams: If prices aren’t listed on food trucks, always ask before ordering.
- Takeout hack: Want to try a restaurant without the wait or tip? Get takeout and eat in a park.
- Payment: Most places accept tap-to-pay, but carry around $50 cash for small shops or emergencies
- Weekends: Add extra travel time for popular restaurants as crowds and subway delays can double your commute.
Cheap Souvenirs & Postcards You Can Actually Afford
Times Square is full of little shops where you can grab keychains, magnets, and postcards (sure, they’re kind of tacky but its part of the fun!) for just $1 so it’s perfect for memories without breaking the bank!
Safety & Street Smarts
New York is generally safe, but it’s still a massive city and awareness is everything.
Stay Alert
Awareness is everything in a big city, not just at night. Even during the day, it’s easy to zone out while walking with headphones or staring at your phone. You don’t need to be hyper-vigilant, but keeping an eye on your surroundings and practicing general street smarts makes exploring safer and smoother. Avoid headphones, keep your eyes on your surroundings, and walk with purpose. Looking lost or zoned out makes you stand out and not in a good way. But if you really need to use headphones, use them strategically. They can help you look “busy” and avoid unwanted attention when walking alone, just keep the volume off or low so you’re still aware of what’s happening around you.
Weird Encounters
You’ll probably run into a few loud or unstable people (t’s just part of the NYC experience). Since the pandemic, a lot of people have lost access to services, so you might see more of it in public spaces. The key is to stay aware so you can quietly steer clear before anything feels off, but don’t make it obvious you’re avoiding them. Keep your cool, avoid eye contact, and walk away calmly and quickly.
Have a Rendezvous Point
If you’re traveling with someone, pick a meeting spot in case you get separated, especially in big places like museums (The Met, MoMA, etc.) where you might lose internet connection.
Mindset Matters
Remember that New York is a city of millions, things move fast, but you’re safe as long as you stay aware and prepared. Walk with confidence, stay observant, and you’ll blend right in.
Final Reminders
- Always charge your power banks and bring working cables.
- Expect subway delays on weekends.
- Don’t stare at people acting erratically. Just move along.
- Walk confidently, and you’ll blend right in.
- New Yorkers are busy but kind, ask for help when you need it.
Bringing It All Together
After three days in the city, what stands out isn’t just the skyline or the museums, but the little lessons I learned along the way. From packing light but smart, to staying aware on busy streets, to knowing when to follow a plan and when to just wander, New York taught me that preparation and flexibility go hand in hand. Traveling with a friend added its own layer of learning: compromise, shared decisions, and appreciating the small victories together. If there’s one takeaway from this trip, it’s this: NYC is as exhilarating as it is unpredictable, and the best experiences happen when you’re ready, aware, and open to the city’s surprises.
Up next is Part 4, Reflections from the Big Apple: What NYC Taught Me as a Visitor.
No Comments